Ever opened your Google Drive and felt like you just walked into a teenager’s bedroom? Documents scattered everywhere, mysterious folders from 2019, and that presentation you swear was titled “Final_FINAL_v2_actually_final.pptx”? Don’t worry – you’re not alone, and I’m here to help you transform your digital disaster into a zen paradise!
Step 1: The Great Purge
First things first – let’s channel our inner Marie Kondo. Open your Drive and take a deep breath. Now, let’s be honest: do you really need that meme collection from 2018? Or that recipe for avocado toast you’ve never made? Start moving files you haven’t touched in ages into a folder called “Archive” (because “Digital Guilt Trip” wouldn’t be professional).
Pro tip: Sort your files by “Last modified” and prepare to be shocked at how many files you forgot existed!
Step 2: Folder Framework
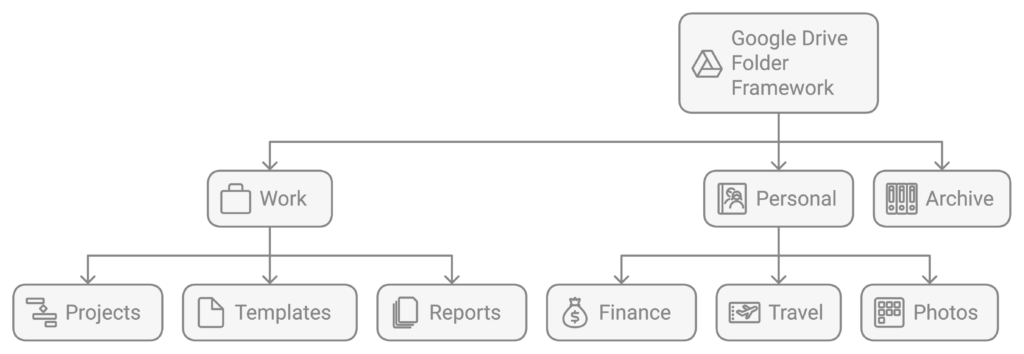
Time to create a folder structure that makes sense! Think of your Drive like a well-organized house:

- 📁 Work (Your office)
- 📁 Projects
- 📁 Templates
- 📁 Reports
- 📁 Personal (Your living room)
- 📁 Finance
- 📁 Travel
- 📁 Photos
- 📁 Archive (Your basement)
No more dropping files on your Drive’s “front lawn” like a digital litterbug!
Step 3: The Naming Game
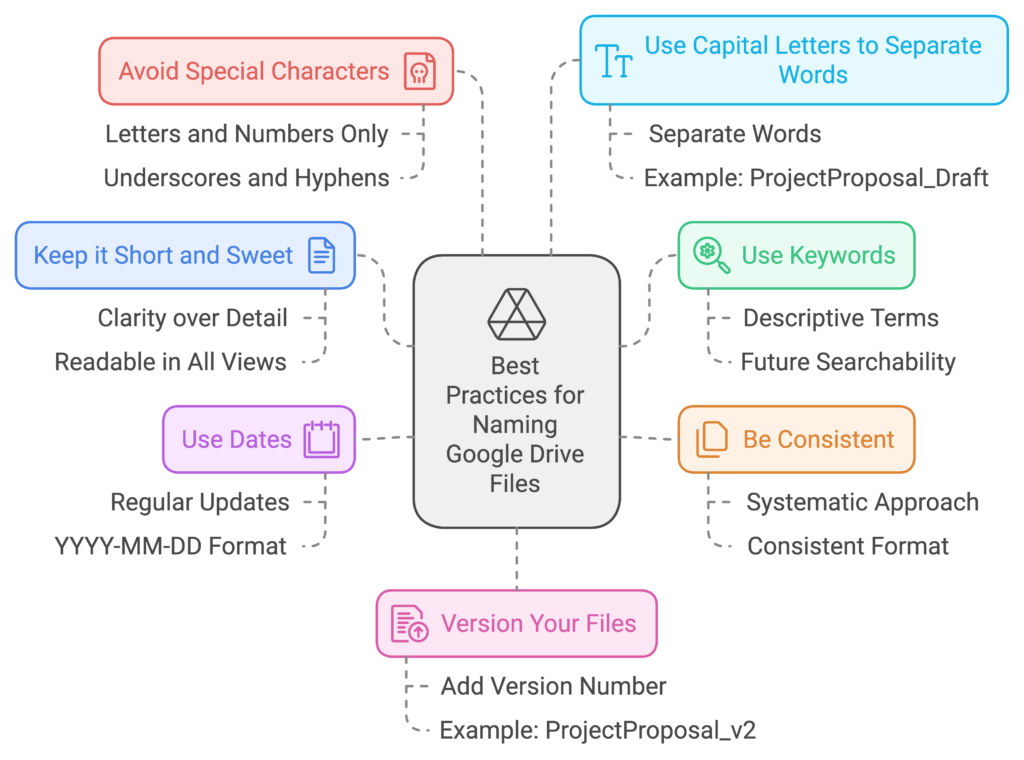
Let’s talk about file names. “Screenshot 2024-01-15 at 15.43.22.png” is not helping anyone. Instead, try:
- Use dates in YYYY-MM-DD format (2024-01-15_Monthly_Report)
- Add project names or categories (Marketing_Logo_Draft_v1)
- Keep it simple but descriptive (2024_Tax_Documents)
- Rightclick on a folder or file to Rename it.

Renaming files and folders:
- Find it: Go to your Google Drive and find the file or folder you want to rename.
- Right-click: Right-click on the file or folder. This will open a menu.
- Choose “Rename”: Select “Rename” from the menu.
- Type the new name: A box will appear where you can type the new name.
- Press “Enter”: Once you’ve typed the new name, just press the “Enter” key on your keyboard.
Remember: Future You will thank Present You for being so thoughtful!
Step 4: Share with Care
Sharing settings in Google Drive are like party invitations – you need to be strategic about who gets in. Create these sharing groups:
- VIP Access (Edit rights for your close collaborators)
- View Only (For those who can look but not touch)
- No Access (For that one colleague who “accidentally” deletes things)

To share and set permissions for a file or folder:
- Select the folder you want to share.
- Right Click and Click Share.
- Type in their email. In the box that pops up, type the email address of the person you want to share with.
- Choose what they can do.
- Can view: They can only look at the file.
- Can comment: They can look at the file and leave comments.
- Can edit: They can look at, comment, and make changes to the file.
- Click “Send” (or “Share”). That’s it! You’ve shared your file.
Step 5: Color Code Like a Boss
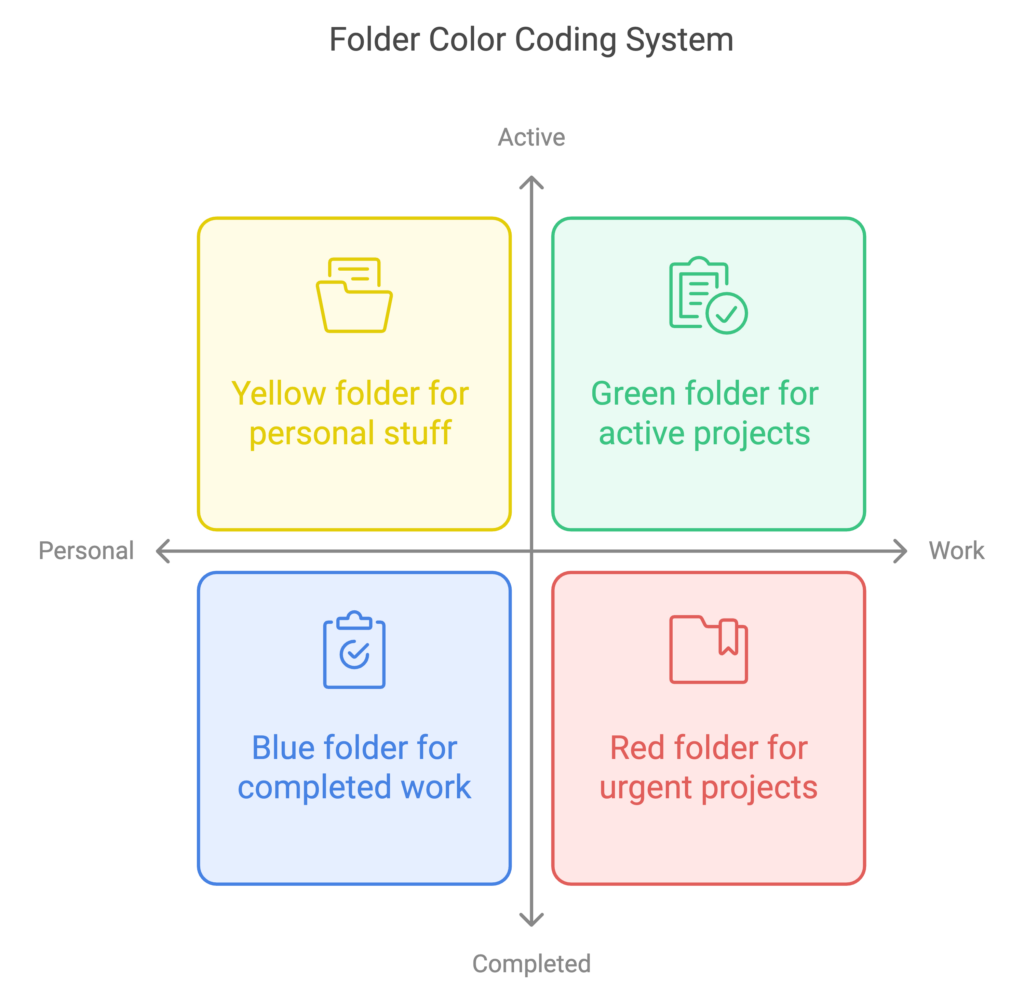
Did you know you can color-code folders in Google Drive? It’s like giving your digital filing cabinet a makeover:

- Red for urgent projects
- Blue for completed work
- Green for active projects
- Yellow for personal stuff
Now your Drive looks like a beautiful rainbow of organization!
Step 6: The Maintenance Dance
Like any good habit (or unlike the treadmill you don’t use) maintaining your Drive needs regular attention:
- Schedule monthly clean-up sessions
- Move completed projects to appropriate archives
- Update sharing permissions when team members change
- Delete or archive unnecessary files
The Final Touch
Remember, organizing your Google Drive isn’t just about having a clean space to welcome Gemini – it’s about making your digital life easier. Think of it as creating a cozy digital home where everything is in its place, and you’re not constantly yelling “Where did I put that file?!” at your screen.
And if all else fails, there’s always the search bar – Google Drive’s equivalent of asking your mom where she put your stuff!
Now go forth and organize! Your future self will thank you when they can find that important document in 2.5 seconds flat instead of diving into the depths of “Untitled folder (12).”
Happy organizing! ✨
From Organized Drive to Automated Workflow!
Think of this Google Drive cleanup as just the first step in your digital transformation journey. Now that you’ve transformed your Drive from a digital junk drawer into an organized space, why stop there? It’s like upgrading from a basic filing cabinet to a smart storage system that knows exactly where everything should go!
Ready to Level Up from Organized to Automated?
Book a free Discovery Call with me! Think of it as consulting with a digital architect who’ll help design your dream Google Workspace. We’ll explore how to transform your newly tidied Drive into a self-maintaining system that keeps your digital life running smoothly.
[Book Your Free Google Workspace Automation Consultation]
P.S. Come to the call with your most time-consuming Drive tasks – still spending hours organizing files and folders? We’ll find a way to automate that! 😉


